

| Version 125 (modified by , 8 years ago) ( diff ) |
|---|
Languages:
Introduction to JOSM
JOSM Terminology
 Node
Node- A node is a point.
 Way
Way- A way is a line connecting multiple nodes. Way, therefore, is a general term for series of joined nodes, not just for roads or ways in reality.
 Relation
- A relation is an ordered sequence of ways and nodes, a logical container used to group elements. Only 1% of the data is modeled using relations.
 Area
Area- An area is a way whose ends are connected.
 Tag
Tag- Tags describe what each node, way or relation represents. Tags are organized into "keys" and "values." Keys are basically larger categories, such as "Highway" or "Land Use," while values are specific features, such as "Primary Road" or "Residential Street," and "Residential" or "Retail" land use.
If a road, track or path is curved, the curve is approximated using a number of nodes within a way, and short lines connecting them. If a way has a direction, that is indicated partly by using tags. For example, "oneway=yes" is a road that goes only in one direction. Other tags refer to being on the left and right of the direction of way along the way.
Launch JOSM
JOSM is a Java program, can be run from the Download page.
Your first edit with JOSM
Welcome screen
When JOSM starts, it presents you with a few messages about recent changes in JOSM. You should have a look at this page from time to time as it keeps you informed on some of the more interesting changes.
Downloading
The next step is to download some data. You can practice using JOSM by downloading your neighbourhood or locality you know or just recently visited.
OSM data
Next, add data for that area from main server, click at: ![]() Download from OSM (
Download from OSM (Ctrl+Shift+↓).

The Download window will be displayed which contains a map of the world. You need to select a small area for your edit, not the entire globe (thus you will see the "Download area too large" message).
To move around the map and select the specific area you want to download, there are several tools:
- Click with the right mouse button to drag the map
- Use the scroll wheel to zoom in and out
- Click with the left mouse button and move the mouse to define an area.
After the "Download area too large" error disappeared and you selected a region, click "Download" to fetch the data from the main server.
Enable Aerial imagery
For most places on earth there is at least one imagery available. You can pick one from the Imagery menu at the top of the editor. Bing and Mapbox are popular, but there may be more recent resources for your locality. Note that all local imagery resources, which are available for the region you are currently working, are displayed in the lower part of the Imagery menu.
Imageries may have different levels of detail and clarity in different places, so it is often worth checking different imageries. Simply select one of them from the imagery menu and you're ready to go.
Mapbox-only: you can request a better imagery for the region of your interest (announcement in 2014-04-11 by Eric Gundersen)

When using imagery, keep in mind that imagery may be offset. That is, due to complexities in processing satellite imagery, features on imagery may not be at the same location as they are in the real world. For reference, check existing features in OpenStreetMap data and compare them with the imagery or download GPS tracks. To download GPS tracks from OpenStreetMap, check the "Raw GPS" box in the download dialog. If you observe an offset in the imagery, you can correct for it by selecting the "New offset" item in the "Imagery" menu.
Editing in JOSM
JOSM is an offline editor which means everything you do won't be visible for anyone else until you upload it to the server. This makes it possible to experiment and repeatedly moving, tagging, adding and deleting elements without breaking anything. Subsequent actions on a single element will go into the database as a single modification when uploaded.
Adding a Node or a Way
The first step of actual editing is to add a node or way to the OSM data. You can add standalone nodes or you can add nodes to ways, especially where there is a junction between two ways.
To add a node, activate "Draw Nodes" mode, either by clicking the ![]() button in the left menu bar, or by hitting the "A" key on the keyboard (the button should then be highlighted).
button in the left menu bar, or by hitting the "A" key on the keyboard (the button should then be highlighted).
Then move the mouse cursor over where you want the node, over a way or over your GPS track (if you uploaded one) and left click wherever you want to place the node. A red dot (a selected node) should appear and a rubber-line spans from that node to the mouse cursor. If you create subsequent nodes, the earlier nodes will be shown as yellow nodes.
A series of joined nodes forms a way.
Adding Tags
Ways or nodes on their own are not of much use unless they are tagged to say what they represent. The Map Features page shows some popular tags, this page will never be complete about all tags.
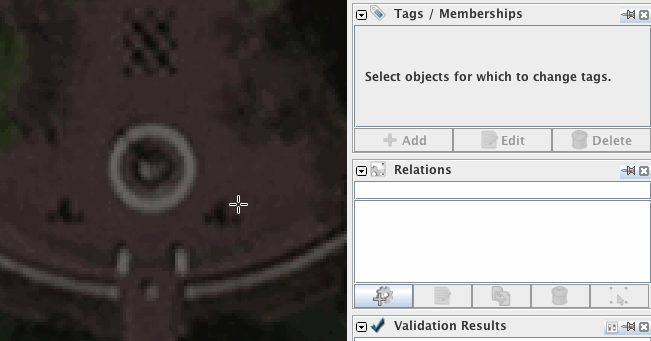
The first step in adding tags is to be sure the Tags/Membership window is open on the right hand side of JOSM. The ![]() button on the left should be highlighted. If it is not highlighted, click on it or hit
button on the left should be highlighted. If it is not highlighted, click on it or hit Alt+Shift+P.
You will see three buttons: ![]() Add,
Add, ![]() Edit and
Edit and ![]() Delete.
Delete.
To edit the properties of a node or way (such as adding a tag) in the Tags/Membership window, the way or node must be selected.
- Enter Select mode by clicking on
 of the left-hand icons or by hitting the
 Skey. - Highlight the way or point you wish to select. Click the
 Add button.
- A dialog box will appear, and you will be asked to select a key and a value for each tag. Type in the key/value pair that represents the tag you are creating. For example, for the key you might type "amenity" and for the value "fountain" (without quotes).
- Click OK. You have now tagged your way. You can add several tags to one object.

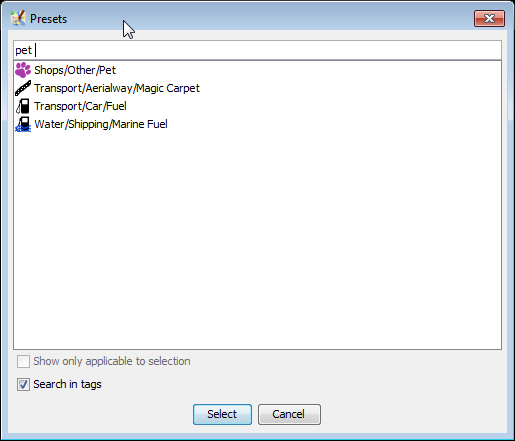
Presets
Instead of adding tags manually you can also use Presets.
All presets can be found: 1. at the main menu (shown on the left below) 2. at the main toolbar (no picture below). 3. with the F3 shortcut (pop-up menu shown below on the right)
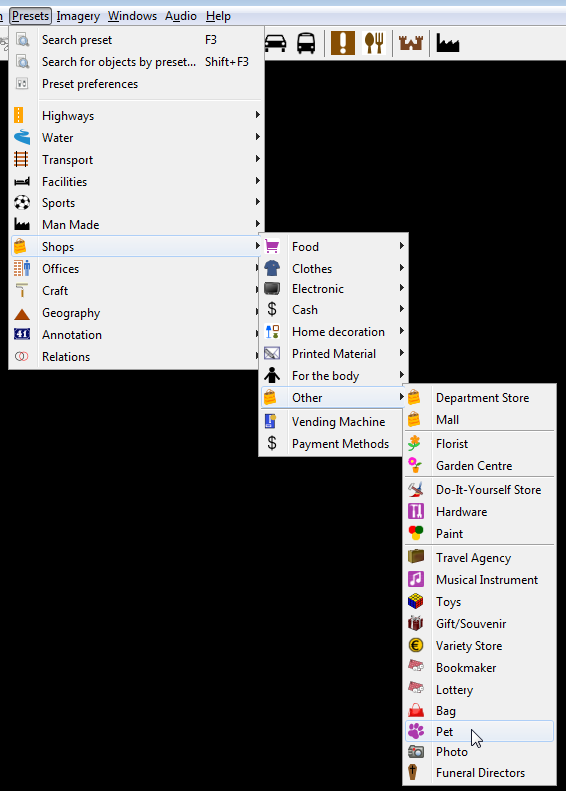
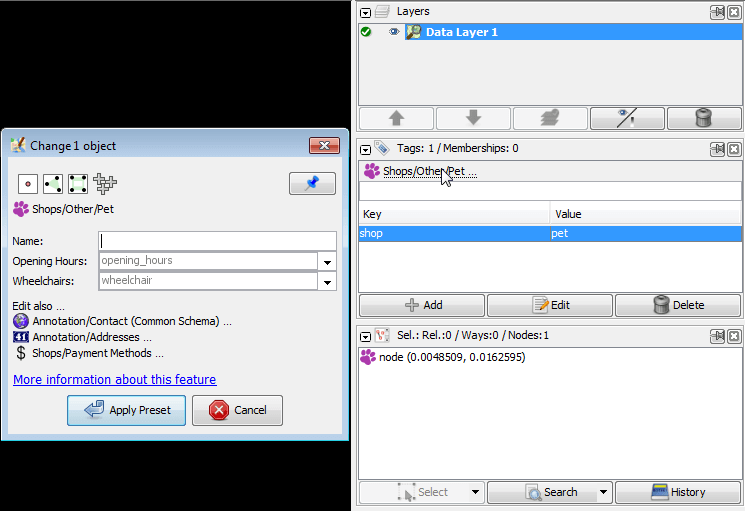
Presets for currently selected object(s) are displayed above the tags for the current object (displayed in Tags/Memberships window):
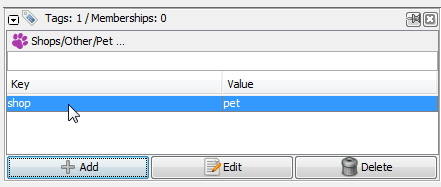
Left mouse click on respective preset heading will open complete preset view
Uploading to OSM
If you are happy with all that you have done then you must upload your work to the OSM server. Click on the ![]() button.
button.
This will automatically trigger a validation of your changes. Review all validation warnings and try to resolve them before you upload. This will prevent unfortunate mistakes such as un-tagged objects or unconnected roads. Note that validator warnings can also be wrong in seldom special cases.
Before you upload, add a proper changeset comment and specify which source you used. This is important as it will show other users who see your changesets what this changeset was intended to modify and from where you took the information.

JOSM will give you an overview of the elements that it is about to upload. You will be asked to provide a short text summary and the source of your edits. This description will be saved with your data on the server and provides information, for example, for the Recent Changes list.
If you need more details or have questions about upload process, it is precisely covered at Upload to OSM.
Thank you!
Thanks for contributing to the OSM database. For more information see our help page or simply press F1 over buttons or any interface element within JOSM. This will directly lead you to the respective help page.
What's next
Results of your job
- Your changes will appear at the "Standard" layer probably within a few minutes.
- Data in your routing software, maps and other services: will be updated per each service (from minutes to days, weeks and months)
Tell your friends
- Tell your friends how easy it is to update data and how your changes get displayed quickly. Truck drivers, couriers, photographers, bikers, journalists, fisherman and simply runners with GPS are always welcome in OSM.
- Precise and actual information may affect how you make decisions in your life. The more people who are active in the project - the faster the data gets updated. And while a few contributors can be called as "active" at a given point in time. Every small change advances OSM to a complete and actual state.
- OSM data may be viewed as clocks: without an arrow you wouldn't know minutes. It often gets outdated - simply refresh it. When clocks stop we wind them up again.
- OpenStreetMap is about the whole planet in the same way how your clock about the current time.
External links
- Mapping with OpenStreetMap with animations by Mapbox team covers mostly the same topics.
- Your first steps with JOSM - the Java OpenStreetMap editor 09/02/2016 by Ramya Ragupathy at Mapbox blog
See also
Back to Main Help
Attachments (10)
-
download-data.gif
(654.3 KB
) - added by 10 years ago.
https://github.com/mapbox/mapping/wiki/Getting-started https://github.com/mapbox/mapping/issues/162
-
poi-restourant.gif
(403.8 KB
) - added by 10 years ago.
https://github.com/mapbox/mapping/wiki/Mapping%20Common%20Features#simple-point-of-interest https://github.com/mapbox/mapping/issues/162
- poi-fountain.gif (142.8 KB ) - added by 10 years ago.
-
enable-imagery.gif
(2.3 MB
) - added by 10 years ago.
https://github.com/mapbox/mapping/wiki/Mapping-with-JOSM#using-imagery https://github.com/mapbox/mapping/issues/162
-
uploading data.gif
(668.8 KB
) - added by 10 years ago.
https://github.com/mapbox/mapping/wiki/Mapping-with-JOSM#uploading-to-openstreetmap https://github.com/mapbox/mapping/issues/162
- presets-from-main-menu.png (53.1 KB ) - added by 10 years ago.
- presets-f3-search.png (13.2 KB ) - added by 10 years ago.
- presets-in-tag-toggle.png (10.5 KB ) - added by 10 years ago.
- single-preset-shown-in-context-of-tagsmemberships-single-object.png (17.9 KB ) - added by 10 years ago.
-
Kapture 2025-06-01 at 12.43.31 2.gif
(4.3 MB
) - added by 14 months ago.
Logging in, selecting map, downloading data