

| Version 18 (modified by , 15 years ago) ( diff ) |
|---|
This page is out of date. There are new buttons with new functions.
Languages:
Layer List Dialog
 Keyboard shortcut:
 Alt+L
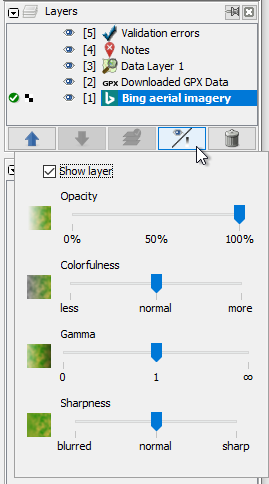
List of currently loaded layers.
There are different types of layers. Each has a Context Menu accessed from the right mouse button which provides operations on the layer.
 OSM Data Layer (menu): holds the OpenStreetMap data (nodes, ways, relations ...).
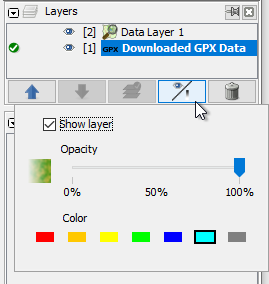
 GPX Layer (menu): holds the GPS data loaded from your local hard disk (by using the open dialog to load GPX files) or from openstreetmap. The context menu (right mouse click on layer in layer list) allows to set special properties for different gps layers (different colors, line style, etc.).
 Marker Layer (menu): Markers are specially identified points on the track. They come in four varieties: simple named markers, audio markers, image markers and web markers. They are created as a side effect of opening a GPX file, containing waypoints from that file, or from a set of waypoints artificially constructed using the context menu entry Make Sampled Audio Layer on the GPX layer, which produces only audio markers.
- Photo Layer (menu): the context menu (right mouse) of a GPS layer provides the menu to import images. Using this feature allows to match digital images with the gps coordinates to ease the naming of streets (for example).
 WMS Layer (menu): backgrounds retrieved from a WMS server. You will usually need the appropriate plugins installed to get these. Examples are Landsat satellite imagery, Yahoo satellite imagery, NPE out-of-copyright Ordnance Survey maps and OpenStreetMap map tiles.
 Validator Layer


The Layer List Dialog also has several buttons beneath it (and context menu entries) which operate on the selected layer:
Move Up
 Up moves the selected layer up one row in the layer stack.
This is important when items in one layer obscure those in layers below.
Move Down
 Down moves the selected layer down one row in the layer stack.
This is important when items in one layer obscure those in layers below.
Activate Layer

Show/Hide Layer
 Show/Hide turns visibility of layer on or off.
The layer is unchanged when hidden, but its contents are not shown.
Adjust Opacity

Merge Layer

Duplicate Layer

Delete Layer
 Delete permanently deletes the selected layer. Cannot be undone !
The first time you try and delete an OSM data layer you get a dialog box asking you to confirm this action, and the ability not to show this warning again. If you choose not to show the warning again, and you wish to later change this you need to go to Advanced Preferences, and change the value of
message.delete_layerto "false"
Info
This button does no longer exist on the Layer List Dialog Panel.
It can be found on the right-click menu and is left for links, right now. Please update links to [wiki:/Help/Action/LayerInfo]

Back to Toggle Dialogs
Back to Main Help
Attachments (2)
- gpx_colors.png (11.1 KB ) - added by 7 years ago.
- LayerList.png (20.9 KB ) - added by 7 years ago.
Download all attachments as: .zip