

| Version 15 (modified by , 15 years ago) ( diff ) |
|---|
Introduction to JOSM
Terminology
A "node" is a point and a "way" is a line connecting multiple nodes, and a "relation" is an ordered sequence of ways. An "area" is a way whose ends are connected, but other than that isn't special. If a road or track or path is curved, it is approximated using a number of nodes within a way, and short lines connecting them. A way has a direction, which is useful for a number of tags, e.g. "oneway=yes" is a road which goes only in the direction the way is drawn. Other tags refer to being on the left and right; of the direction of travel along the way.
Starting JOSM
JOSM is a Java program, and comes in a .jar file. If you don't know how to start it, ask someone familiar with your platform how to run a Java program.
When JOSM starts up, it presents you with a few messages about recent changes in JOSM. Your next step should be to download some data. If you have a GPX file (downloaded from your GPS receiver) for the area of interest, load it into JOSM (File/Open). That will show you the area of the GPX file. Click on the green down arrow JosmImage(download) to fetch the data from openstreetmap.org.
An alternative is to download existing GPX points from the OSM server. In order to start this process you will need to know the latitude and longitude coordinates of the relevant area. The easiest way to do this is to visit the map and to zoom in to the area you are interested in, then to move the mouse over the View tab, and copy the resulting link. You will need to have zoomed in to a fairly small area, in residential areas where there is a lot of existing OSM activity you will need to be at a zoom level of 12, other less dense areas will probably be able to be downloaded at zoom level 14. Once you have copied the OSM link ( which will look something like http://www.openstreetmap.org/index.html?lat=50.687181128986&lon=-1.0795289310465817&zoom=14) you can then paste this into the "URL from open streetmap.org box on the JOSM download option.
Editing in JOSM
The first step of actual editing is to add a node to the OSM data where there will be a junction or a significant change in direction. To add a node, highlight the node button, either by clicking the 3rd button in the left menu bar, or by hitting the "A" key on the keyboard (the 3rd button should then be highlighted). Move the mouse cursor over your GPS track, and left click it wherever you want a node to be. A white dot (a selected node) should appear, and as you create subsequent nodes the earlier nodes will be shown as red dots.
A series of joined nodes forms a way
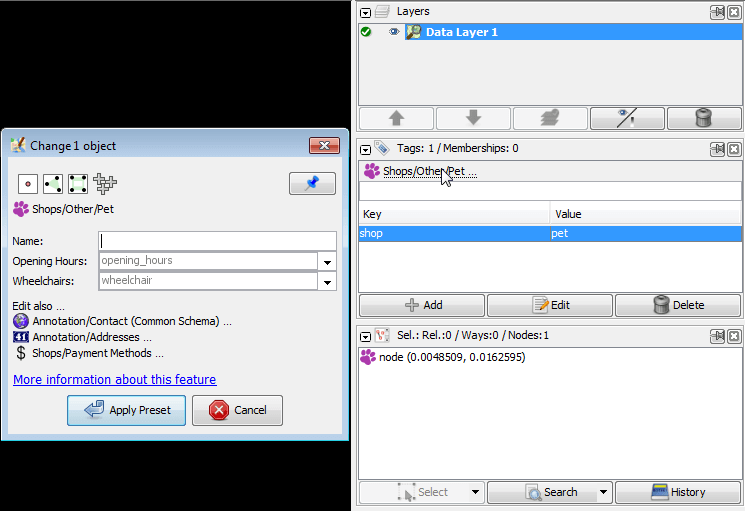
Ways on their own are not much use unless they are tagged to say what they represent. Map Features shows all the current key value pairs which could be used on a way. Ensure the "properties" window is open on the Right hand side of JOSM, the 10th button on the left ( a hand pointing to a box) should be highlighted, if not click the button or hit "Alt+P". On the Right hand side of JOSM there should be a properties window, it will have a "plus" sign with add next to it, then edit, then delete. Ensure your new way is highlighted, then click the "add" button, a dialog box will appear and you will be asked to select a key and a value. Type in the key/value pair which represents the way you are creating, eg for the key type "highway" without the quotes, and for value type "secondary" again without the quotes. then click OK. You have now tagged your way.
If you are happy with all that you have done then you need to upload this to OSM server. Click on the green down arrow JosmImage(upload).
Conventions
A couple of other points about creating ways.
1) Dual carriage ways should be drawn as two separate parallel ways, with each carriage way being a different way.
2) If a street is one way (including the individual carriageways of a dual carriageway) the way should be drawn in the direction of travel.
3) The key / value tagging is case sensitive, all keys should be entered in lower case.
Back to Main Help
Attachments (9)
-
download-data.gif
(654.3 KB
) - added by 8 years ago.
https://github.com/mapbox/mapping/wiki/Getting-started https://github.com/mapbox/mapping/issues/162
-
poi-restourant.gif
(403.8 KB
) - added by 8 years ago.
https://github.com/mapbox/mapping/wiki/Mapping%20Common%20Features#simple-point-of-interest https://github.com/mapbox/mapping/issues/162
- poi-fountain.gif (142.8 KB ) - added by 8 years ago.
-
enable-imagery.gif
(2.3 MB
) - added by 8 years ago.
https://github.com/mapbox/mapping/wiki/Mapping-with-JOSM#using-imagery https://github.com/mapbox/mapping/issues/162
-
uploading data.gif
(668.8 KB
) - added by 8 years ago.
https://github.com/mapbox/mapping/wiki/Mapping-with-JOSM#uploading-to-openstreetmap https://github.com/mapbox/mapping/issues/162
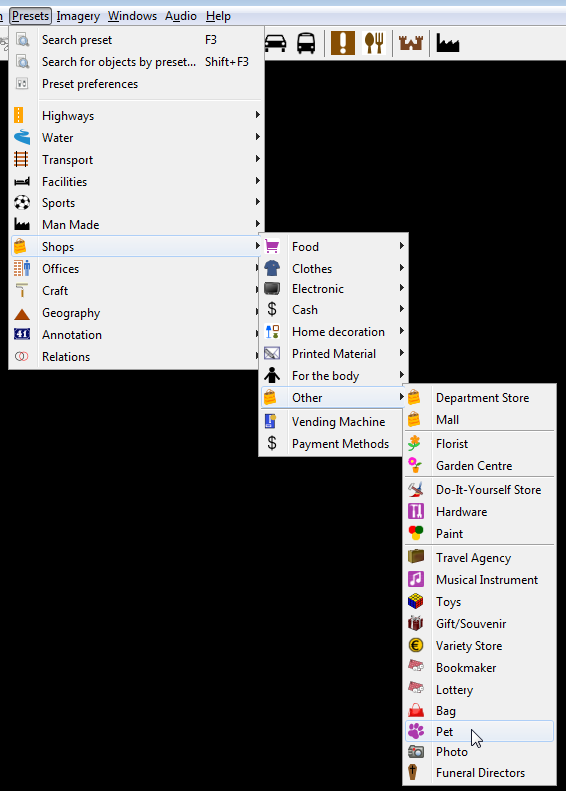
- presets-from-main-menu.png (53.1 KB ) - added by 8 years ago.
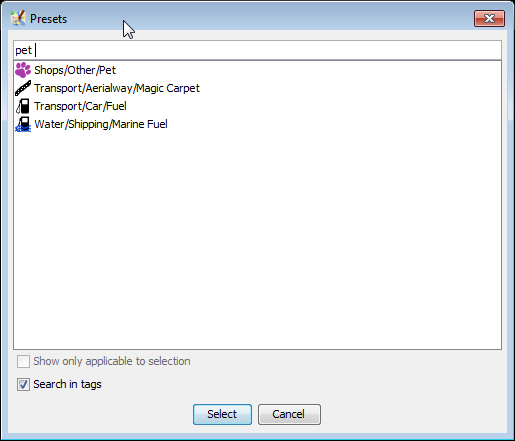
- presets-f3-search.png (13.2 KB ) - added by 8 years ago.
- presets-in-tag-toggle.png (10.5 KB ) - added by 8 years ago.
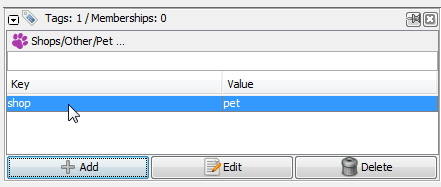
- single-preset-shown-in-context-of-tagsmemberships-single-object.png (17.9 KB ) - added by 8 years ago.