

| Version 77 (modified by , 8 years ago) ( diff ) |
|---|
Languages:
- English
- español
- français
- 日本語
- Nederlands
- русский
- українська
Table of Contents
If you are looking for complete list of relations loaded in your JOSM, see Relations window
Relations can be also edited using simple right click menu in Tags/Membership window
Some of plugins can simplify editing of relations, namely turnrestrictions or turnlanes
Relation Editor window
The relation editor window is one of many options to create, modify, and delete relations; this is most comprehensive tool in core JOSM.
Activation steps
- in Relation editor:
- Duplicate button will open created relation in RE
- Buttons in "Memberships" part can open one or multiple RE
- Double click complete relation in memberships table to open RE
- Selection relation(s), then press "Edit" button in "Parent Relations" tab to open one or multiple RE
- Double click on item in "Parent Relations" tab to open RE
- in Tags/Membership window:
- If there "Member of" table, you can:
- Use right mouse click and select "Edit" to open RE
- Double click an item to open RE
- If there "Member of" table, you can:
- in Relations window:
- Use "Create a relation" button to create a new relation and open it in RE
- Select relations (in "Relations" window), use second button to open one or multiple RE
- Duplicate relation button will open it in RE
- in Selection window:
- Select relation(s) (but now in "Selection" window), use "Edit" context command to open one or multiple RE
- Double click a relation to open RE
Relation Editor
Buttons on top
 | Refresh relation from data layer (see below for more explanation) |
 | Apply the current changes made within the relation editor to the data TODO: clarify when to use it |
 | Clone e.g create a copy of the relation and open it in another relation editor window |
 | Delete the currently edited relation |
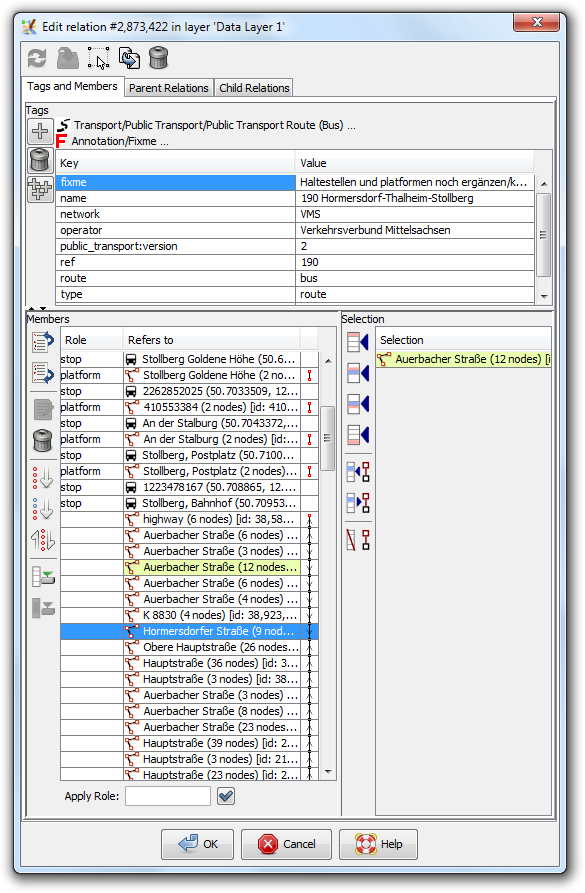
Tags and Members tab
The tags and members tab has an upper part similar to the Tags/Memberships window where tags for the relation can be entered and a lower part that contains the list of members of the relation on the left side and a list of the current selection on the right.

Upper half, tags of the relation itself
On top in the upper part are links to presets matching the current tags of the relation and below are the tags in a table.
Presets matching relation can be opened here (they are more suggestive than tags panel). Click respective link to open full preset, as usual.
The three button one the left are:
 | Add a new tag |
| | Delete the current selected boxes of the tag table |
 | Paste tags from buffer |
Note: In general it is easier to modify tags with the Tags/Memberships window.
Bottom half, left side, members
In the lower left part is the member table of the relation.
Table
The table shows for each member:
- its role on the left
- in the middle the object type as icon plus some identifier like name, ref or simply the id of the object
- Double-clicking on a line with complete relation there will open this Relationship editor for the relation in question
- on the right information about neighbor ways' connections useful for consistency checks like checking that the members of a multipolygon form closed ways or that a route is a complete line without missing some ways in the middle.
Context menu in table
Gap is indicated as red dot.
- Zoom to - will zoom to the topmost element of the currently selected members
- Zoom to Gap (actionable only when gap is selected) - will zoom to gap
- Zoom to previous gap
- Zoom to next gap
Currently selected members
Selecting members in the #Table works as usual: hold Ctrl to select multiple items. Left click on the item to add/remove it from the selection.
On the right you can see example that only "K 8830" way was selected.
Buttons
The buttons on the left offer the following actions if appropriate:
 | Move the currently selected members up (Alt+up)
|
 | Move the currently selected members down (Alt+down)
|
 | Open additional relation editors for the currently selected members of object type relation |
| | Remove the currently selected members from the relation (Alt+Delete)
|
 | Sort the currently selected members (Alt+End)
|
 | Sort the currently selected members and all members below (expert mode only) |
 | Reverse the order of the currently selected members |
 | Download all incomplete members (Alt+Home)
|
 | Download selected incomplete members |
Text field below the table used to set role to #Currentlyselectedmembers
Bottom half, right side, selection
In the lower right part is the selection list where currently selected objects in the current data set are shown. The list is basically a mirror of the Selection window. Objects with yellow background color are already member of the relation.
The buttons offer following actions:
 | Add all objects selected in the current data set before the first member |
 | Add all objects selected in the current data set before the first selected member |
 | Add all objects selected in the current data set after the last member selected member |
 | Add all objects selected in the current data set after the last member |
 | Select relation members in the member list which refer to objects in the current selection |
 | Select objects in the current data set for currently selected relation members in the member list |
 | Remove all members referring to one of the selected objects in the current data set |
Parent Relations tab
Reload button - will fetch all parent relation from API (parent relations list will be empty if there no parent relations).
Double click at any parent relation will open Relation editor with respective relation.
Note: only one parent relation is shown for relation 51560:

Child Relations tab
TODO: any details?

Drag and Drop support
The relation editor has an advanced drag and drop support. You can do the following actions:
- reorder the members in the members list
- move an object from the Selection window to the members list in the relation editor (with automatic role suggestion)
- move an object from the members list of one relation editor instance to another relation editor instance
- move an object from the members list of one relation editor instance to another relation editor instance from another layer*
- move an object from the members list of one relation editor instance to another relation editor instance from another JOSM instance*
- move an object from the members list of the relation editor or from the Selection window to an external text editor
* provided the objects are part of the dataset
Error and Warning Messages
Conflict in data when saving or applying a relation
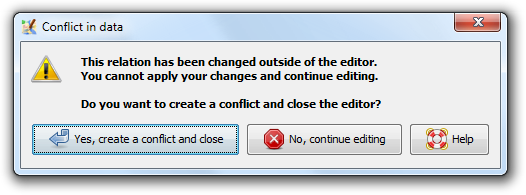
A relation may be edited concurrently in the relation editor window and outside of the relation editor window. While the relation editor window for a relation is open you may for instance split a way the relation refers to. In this case, the relation is modified but the changes due to the way splitting are not immediately reflected in the relation editor window. You need to click on the refresh button to update the data in the relation editor. Anyhow JOSM keeps track of them and when you close the relation editor window or apply changes, without pressing the refresh button before, the following warning message is displayed:

It indicates that JOSM is aware of two incompatible versions of this relation. Since JOSM can't resolve the differences between these versions automatically, it proposes to create a conflict which you can resolve later using the Conflict Dialog.
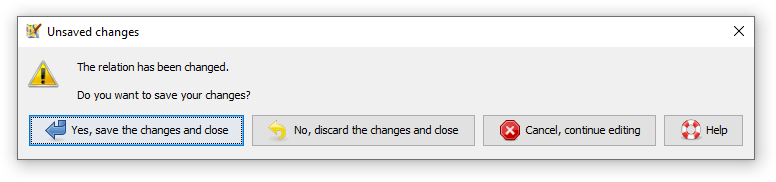
A similar warning is the following:

It appears when you made changes in the relation and in the data layer and then click on the refresh button.
So the workflow should always be like this (if you want to do changes in the relation editor and the data layer at the same time, i.e. while the relation editor stays open):
- After doing changes in the relation editor and before doing changes in the data layer press the
 apply button.
- After doing changes in the data layer and before doing changes in the relation editor press the
 refresh button.
Otherwise you will see the above warnings and end in a conflict.
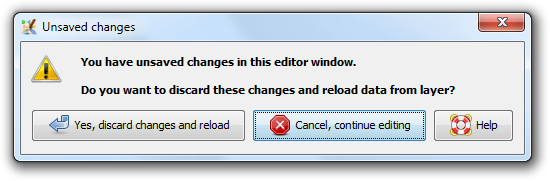
Unsaved changes
The following warning appears when you make changes in the relation editor and do not press the Apply or OK button, but the Cancel button, the cross or Escape to close the window.

See also
 Relations window - all loaded relations are listed here
- Object - detailed explanation what relation is
- Help/Relations - steps how to create parent relations, edit parent/child relations and so on
- Concepts/Conflict
Back to JOSM interface
Back to Main Help
Attachments (7)
- relation_conflict.png (33.7 KB ) - added by 8 years ago.
- warning-conflict-in-data.png (34.1 KB ) - added by 8 years ago.
- relation 51560.png (10.5 KB ) - added by 8 years ago.
- child relations of 1152180.png (11.1 KB ) - added by 8 years ago.
-
relation_editor.png
(100.7 KB
) - added by 6 years ago.
relation editor screenshot
- children of 6016064.png (38.7 KB ) - added by 5 years ago.
-
relation_editor_unsaved_changes_warning.png
(13.4 KB
) - added by 4 years ago.
unsaved changes warning
Download all attachments as: .zip